Getting Started
This guide walks you through setting up WildTrack360 for your wildlife rehabilitation organisation, from your first sign-in to admitting your first animal.
Prerequisites
Before you begin, ensure you have:
- A modern web browser (Chrome, Firefox, Safari, or Edge)
- An invitation to your organisation's WildTrack360 instance, or the sign-up link from your administrator
- Your wildlife rehabilitation licence number handy
Step 1: Sign In
- Visit your organisation's WildTrack360 URL
- Sign in using the Clerk authentication screen (email/password or social login)
- If this is your first time, you'll be directed to the role setup page
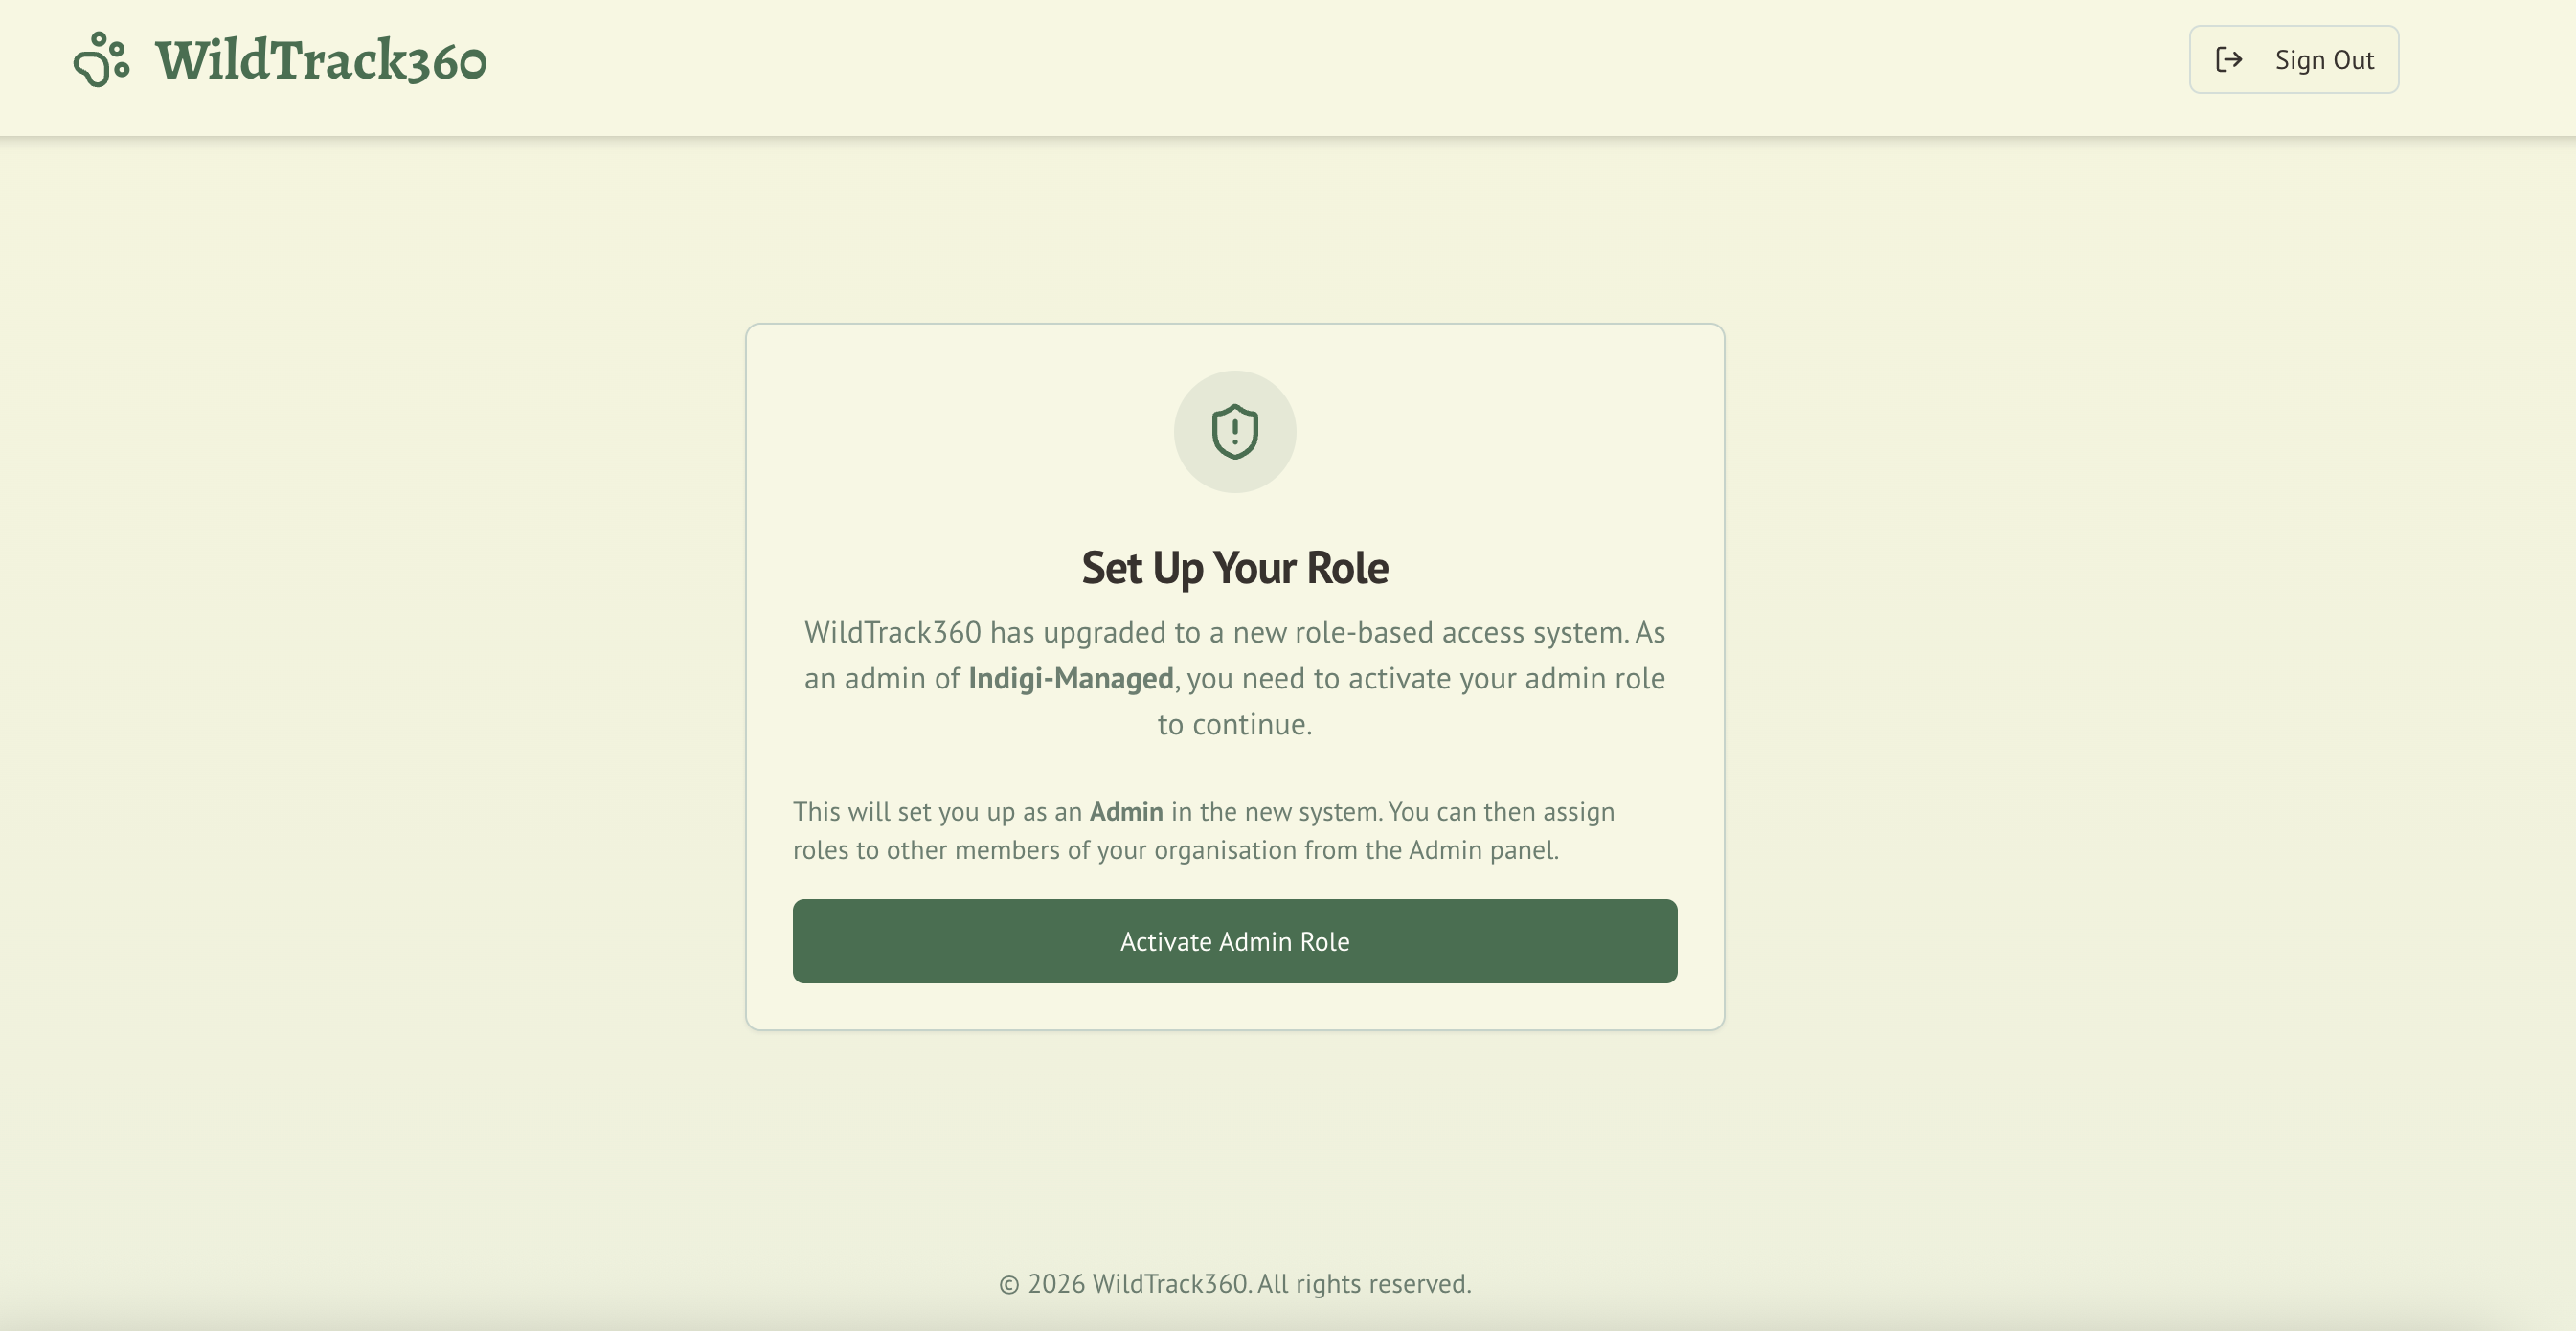
Step 2: Choose Your Role
On first sign-in, you'll select your role:
- Admin — if you're the organisation leader or system administrator
- Coordinator — if you manage specific species groups and their carers
- Carer — if you provide hands-on animal care
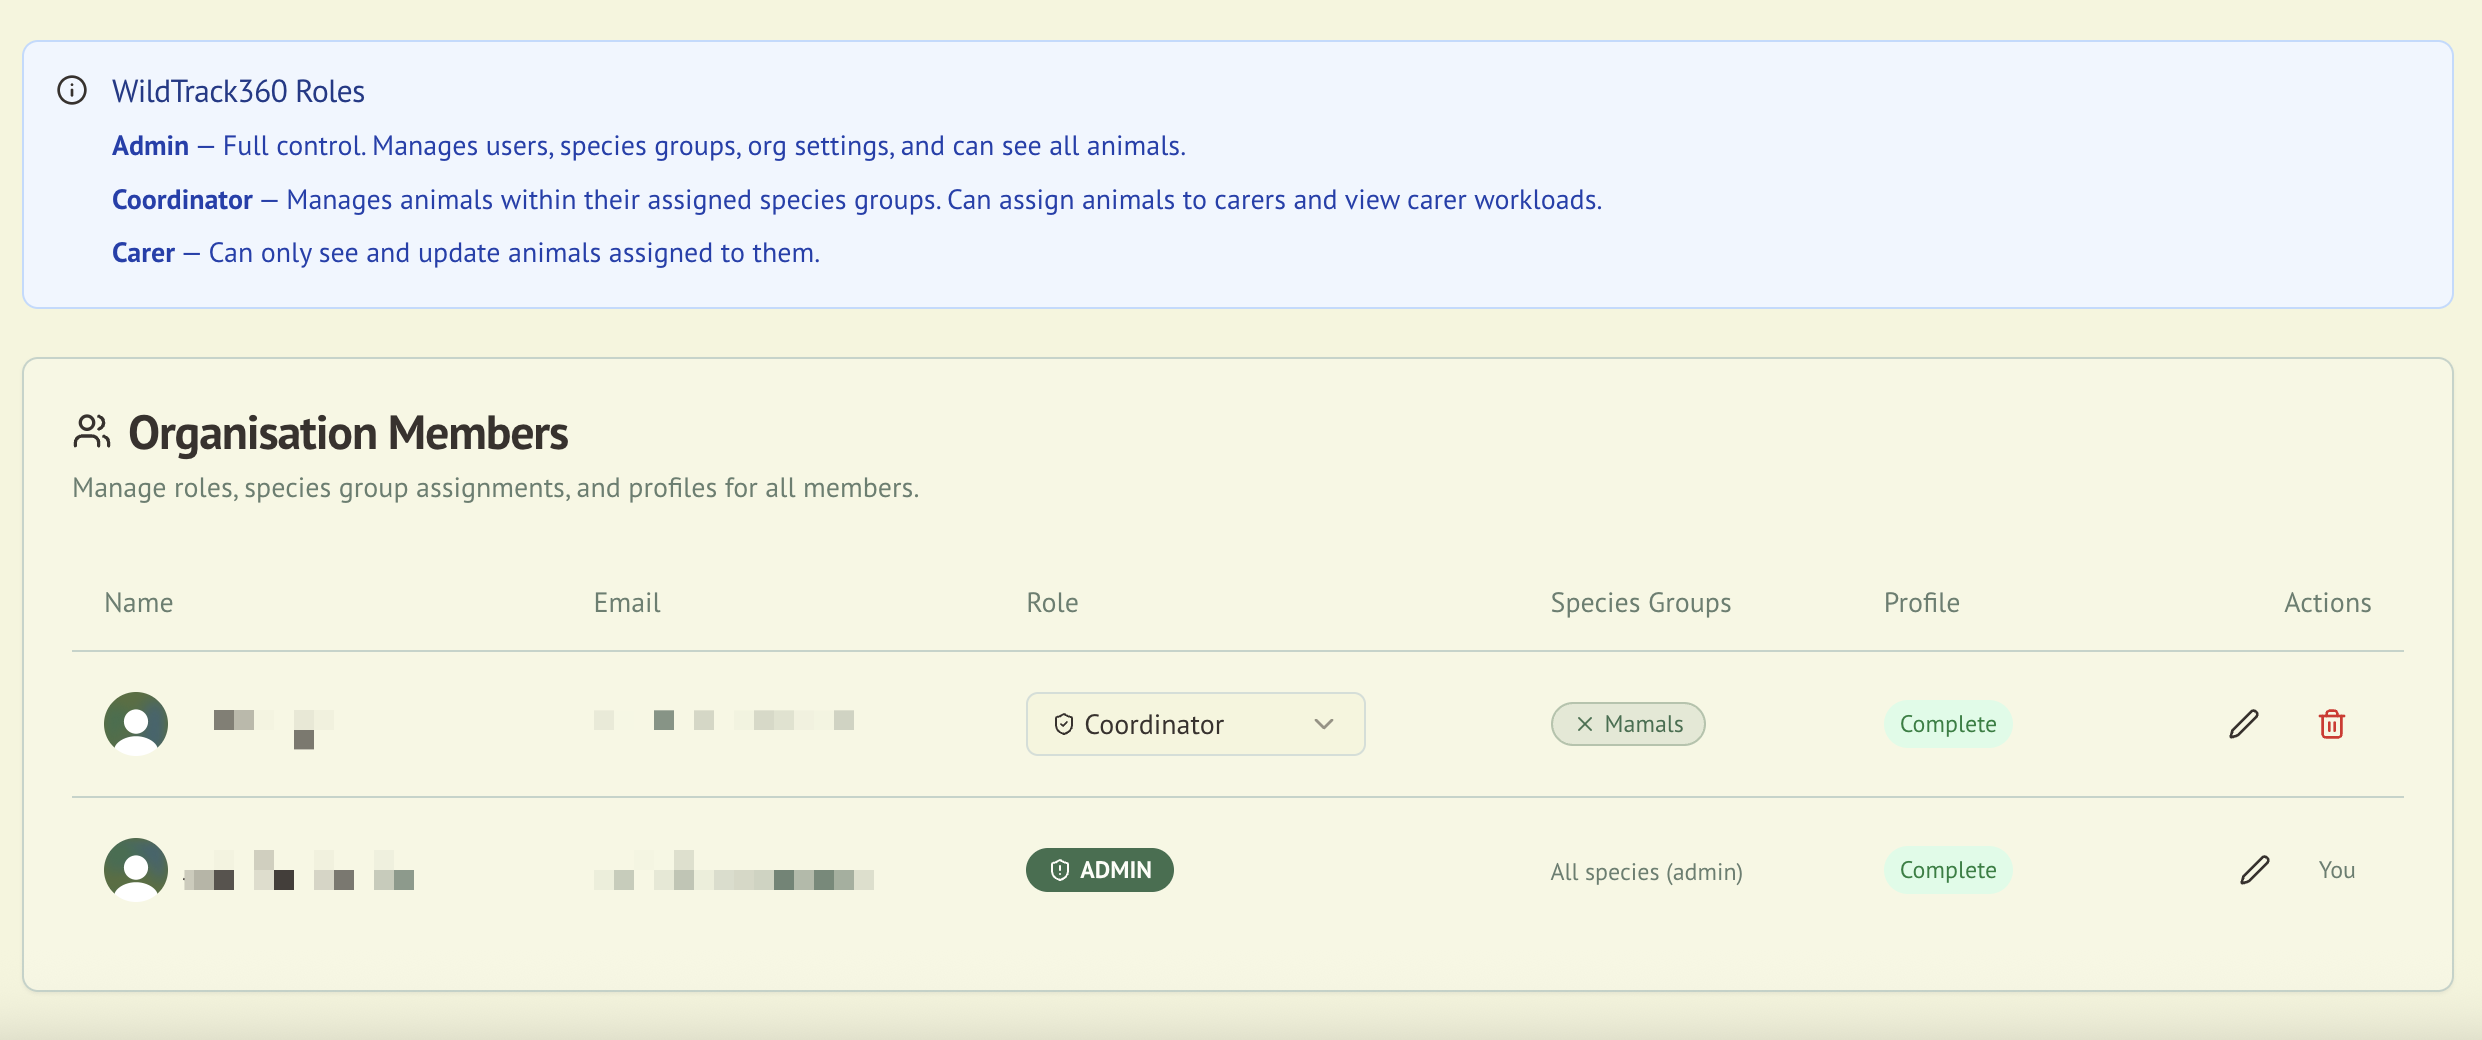
Your admin can adjust your role later if needed. See Roles & Permissions for details.
Step 3: Complete Your Profile
After role setup, complete your carer profile with:
- Phone number — required for compliance
- Licence number — your wildlife rehabilitation licence
- Training records — any relevant qualifications
You'll see a dashboard alert until your profile is fully complete. This information is needed for regulatory compliance reporting.
Step 4: Explore Your Dashboard
Your dashboard view depends on your role:
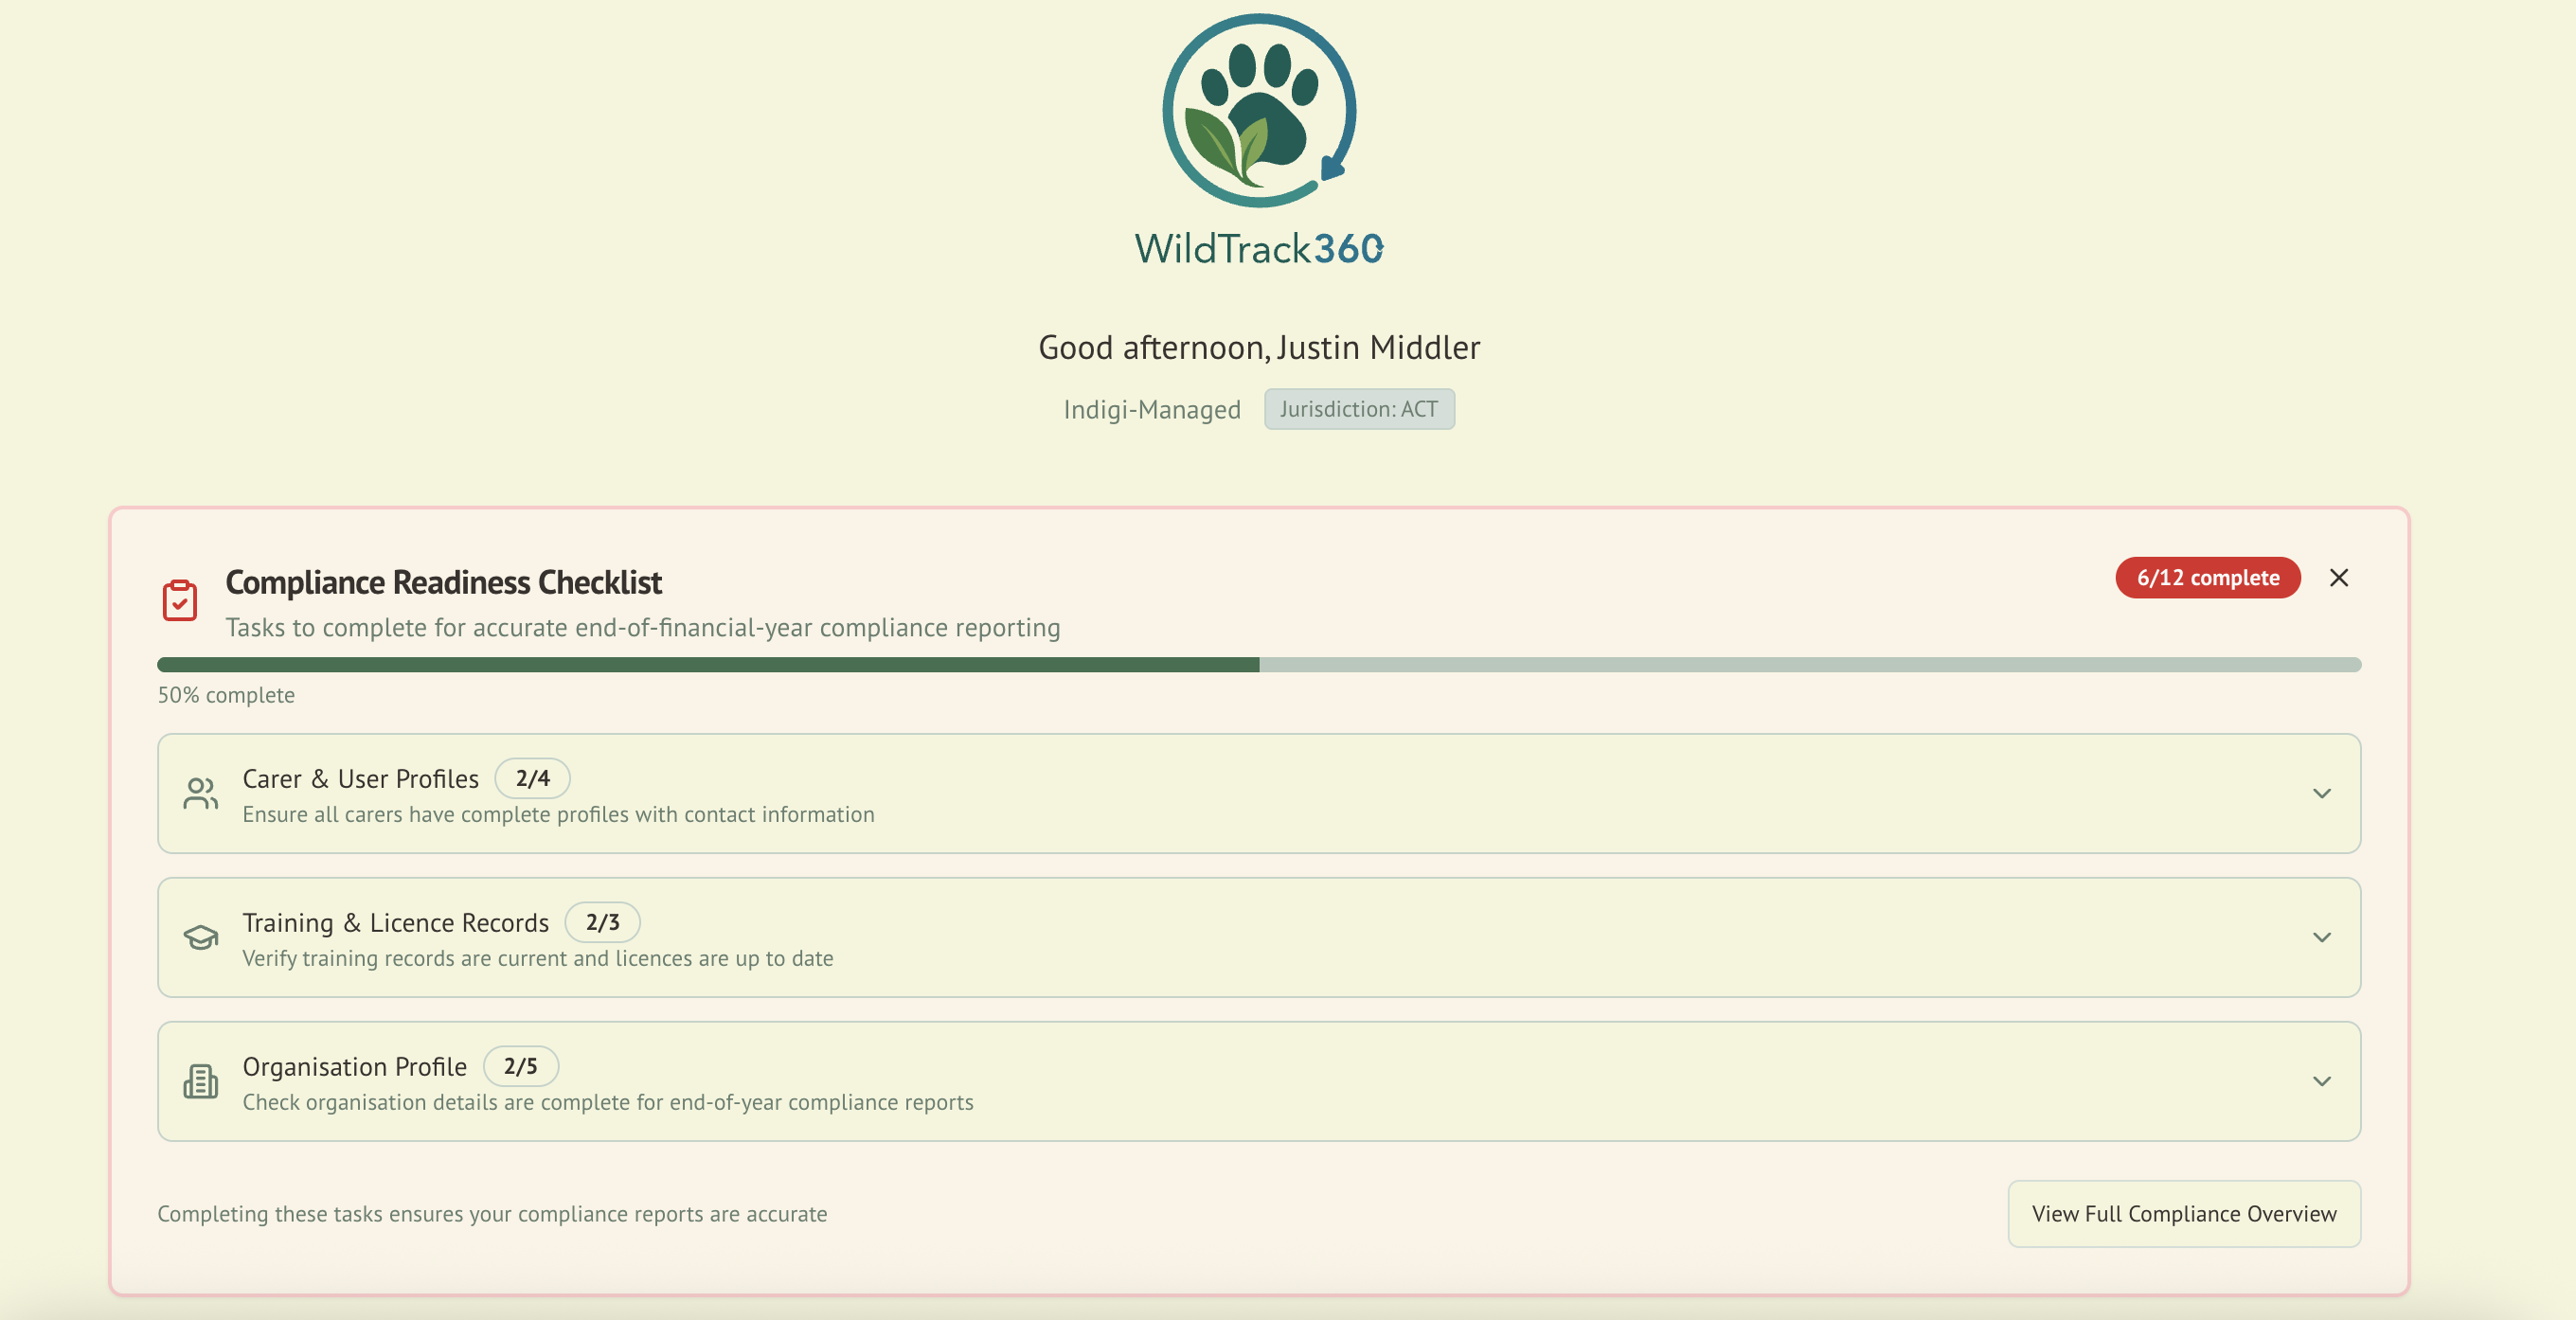
Admin Dashboard
- Compliance Readiness Checklist — shows your organisation's compliance status across carer profiles, training/licence records, and organisation settings
- Animal overview — summary of all animals currently in care
- Quick actions — links to manage animals, view reports, and access the admin panel
Carer Dashboard
- Your animals — animals assigned to you within your species groups
- Profile completion — alert if your profile needs attention
- Quick actions — add records, view your assigned animals
Customise Your Dashboard
You can arrange the home dashboard to suit how you work:
- Drag widgets (Call Log, Feed Roster, Key Stats, Training Alerts, Species Distribution, Recent Admissions, Carer Workload, Releases vs Admissions, Animals, and any saved custom reports) to reorder them
- Resize a widget between full-width and half-width
- Hide widgets you don't need and show them again later
- Set the trend window (4, 8, 12, or 26 weeks) used by trend charts
Your layout is saved in your browser on that device, so the dashboard remembers your arrangement next time you sign in. It is not shared between devices, and clearing your browser data resets it to the default layout.
Quick Navigation (Command Palette)
Press Cmd+K (macOS) or Ctrl+K (Windows/Linux) from anywhere to open the command palette. Start typing to jump straight to a page — animals, compliance registers, the NSW Annual Report, care tools, the admin panel, and more. Use the arrow keys to move through results, Enter to open, and Esc to close. The shortcut is ignored while you're typing in a form field, so it won't interrupt data entry.
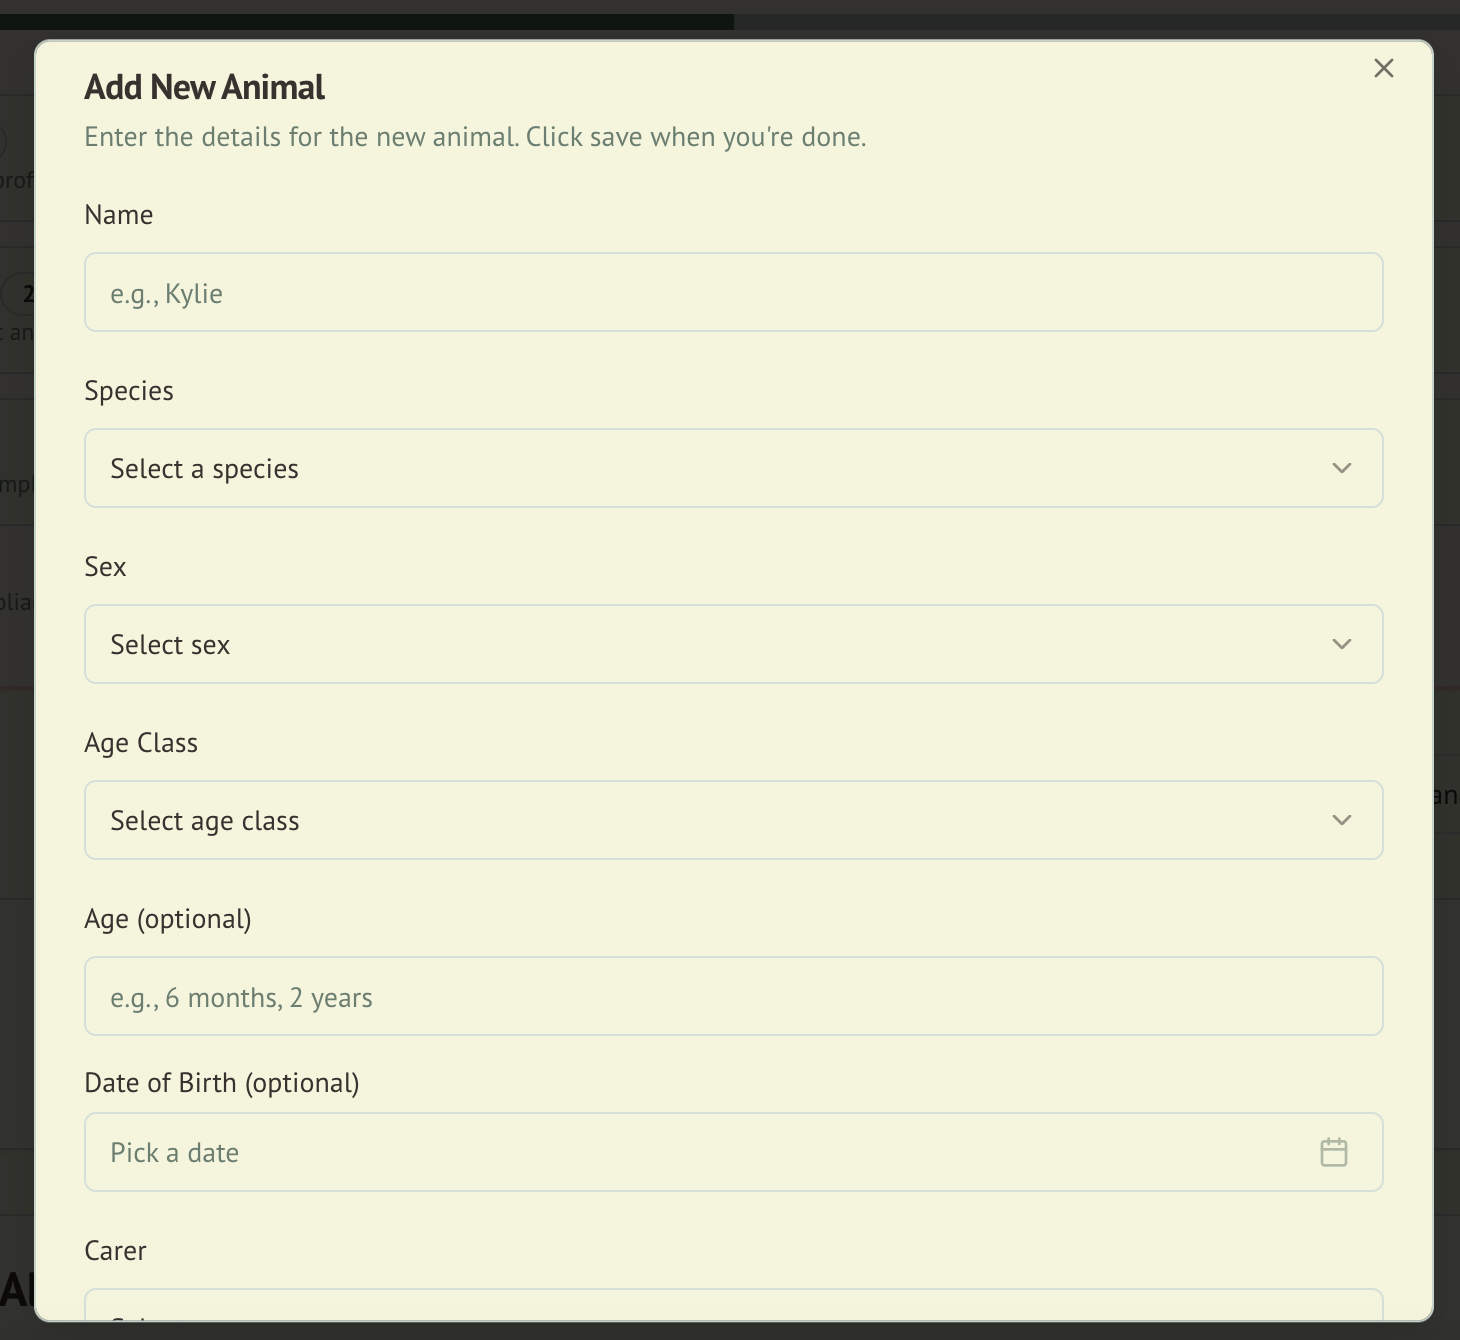
Step 5: Admit Your First Animal
- Click Add New Animal from the dashboard (or navigate to the animals section)
- Fill in the admission details:
- Species (search by common name)
- Sex and age classification
- Rescue location (drop a pin on the map for automatic address capture)
- Rescue date and circumstances
- If in NSW: encounter type, animal condition, and initial weight
- Assign a carer (or leave unassigned for now)
- Save the record
See Wildlife Admission for the full guide.
Step 6: Set Up Your Organisation (Admins)
If you're an admin, complete these setup tasks:
- Organisation profile — add your organisation name, jurisdiction, contact details, and licence number
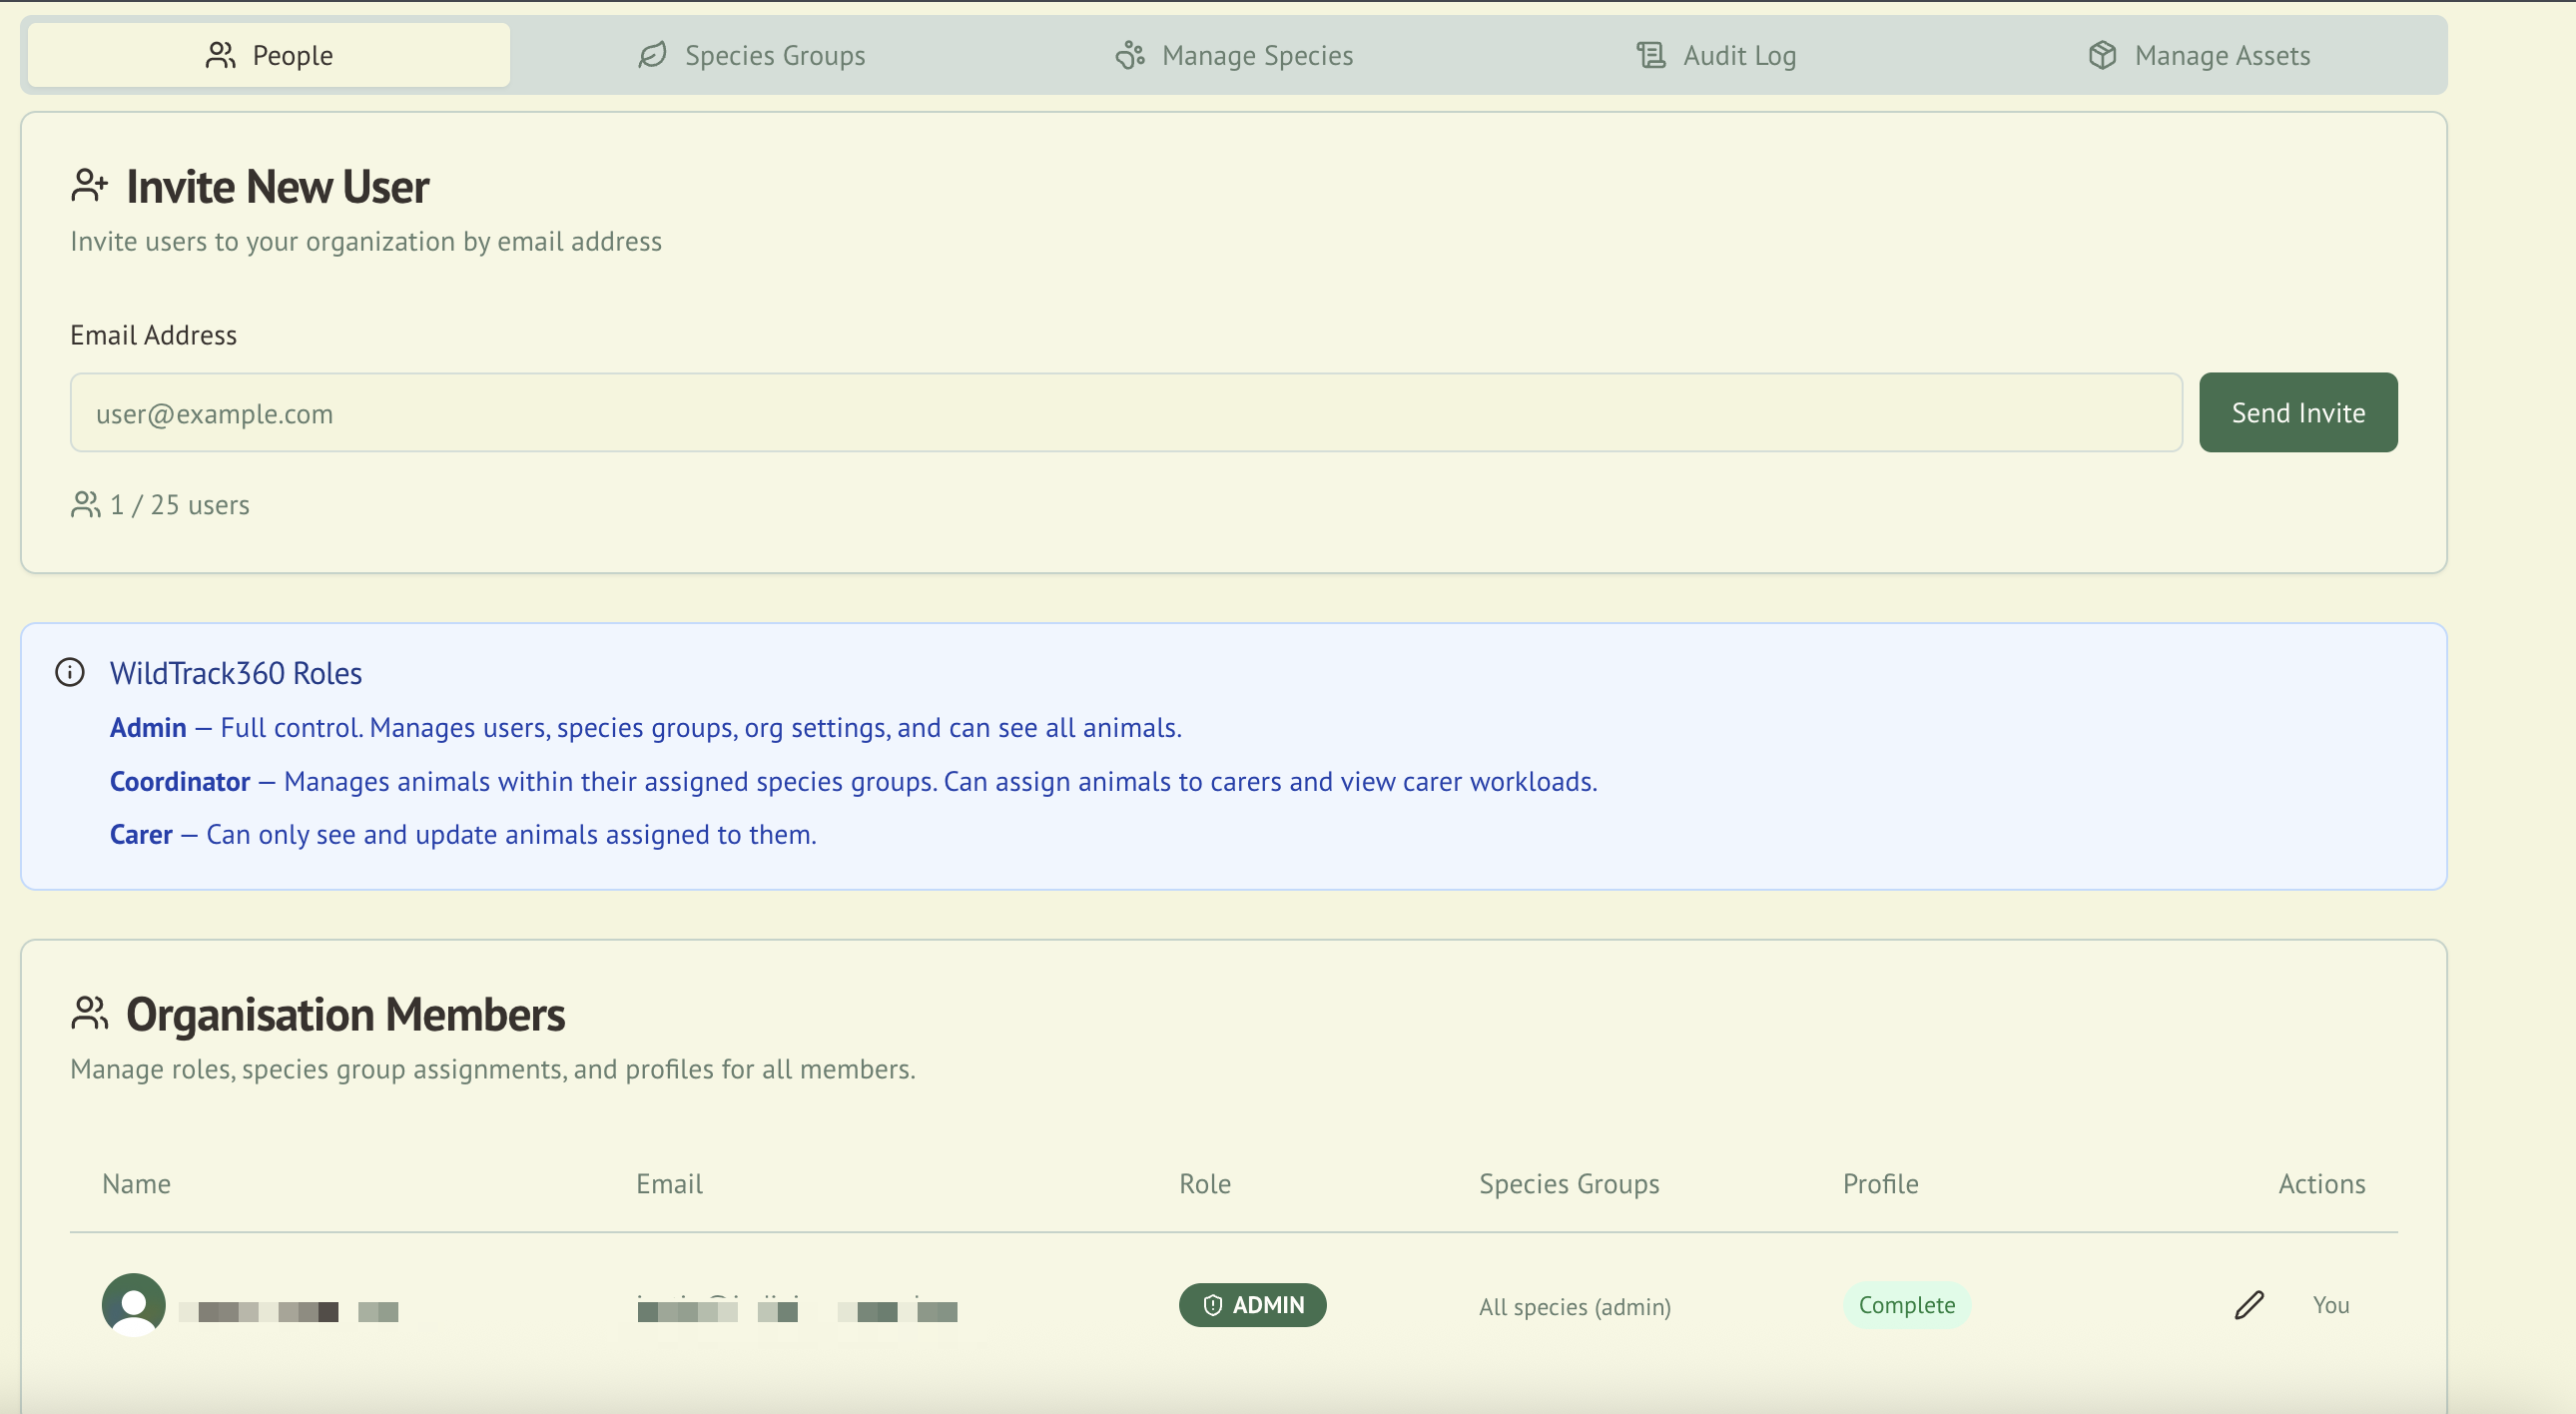
- Invite members — add your carers and coordinators through Clerk
- Assign roles — set appropriate roles for each team member
- Species groups — assign species group access to carers based on their qualifications
- Review compliance — use the Compliance Readiness Checklist to verify everything is in order
Next Steps
- Wildlife Admission — learn the full admission workflow
- Daily Operations — set up your daily care routines
- Compliance — understand your regulatory requirements
- Roles & Permissions — configure access for your team
- Species Management — review species care protocols